Tuesday, 27 March 2018

My Daily Make Up Routine

My daily make up routine

First of all I always cleanse my face when I wake up to make sure any traces of make up are gone and to prep my skin for the day.

Once I’ve had breakfast I lay out all the make up I’m going to use on my desk.  This saves time searching for things between application.  Another tip would be to have a separate make up bag with daily make up and one with the less used make up or weekend kit.  I try and do this but actually have many bags and drawers that I keep my make up in.  P.s I promise I will do a glam room tour soon.

I always put on a light moisturiser before any make up, at the moment I’m using the Simple one.

Then it goes a follows;
1 garnier roll on anti dark circle concealer
2 maybelline master camo green concealer on red areas with the tiny brush provided
3 foundation blended into all of the face with a Wilko foundation brush
4 maybelline master camo concealer in a mixture of colours around my nose, around my eyes and problem areas. I tend to use yellow and peach under the eyes and mix the other two shades for anywhere else all with my ring finger
5 add bonzer to my cheeks, nose, forehead and chin - I’m only doing this before powder because I’m using Vita Liberata luxury tan and it states it is best used on moisturiser or foundation
6 then I set my whole face with collection translucent pressed powder and a Wilko powder brush
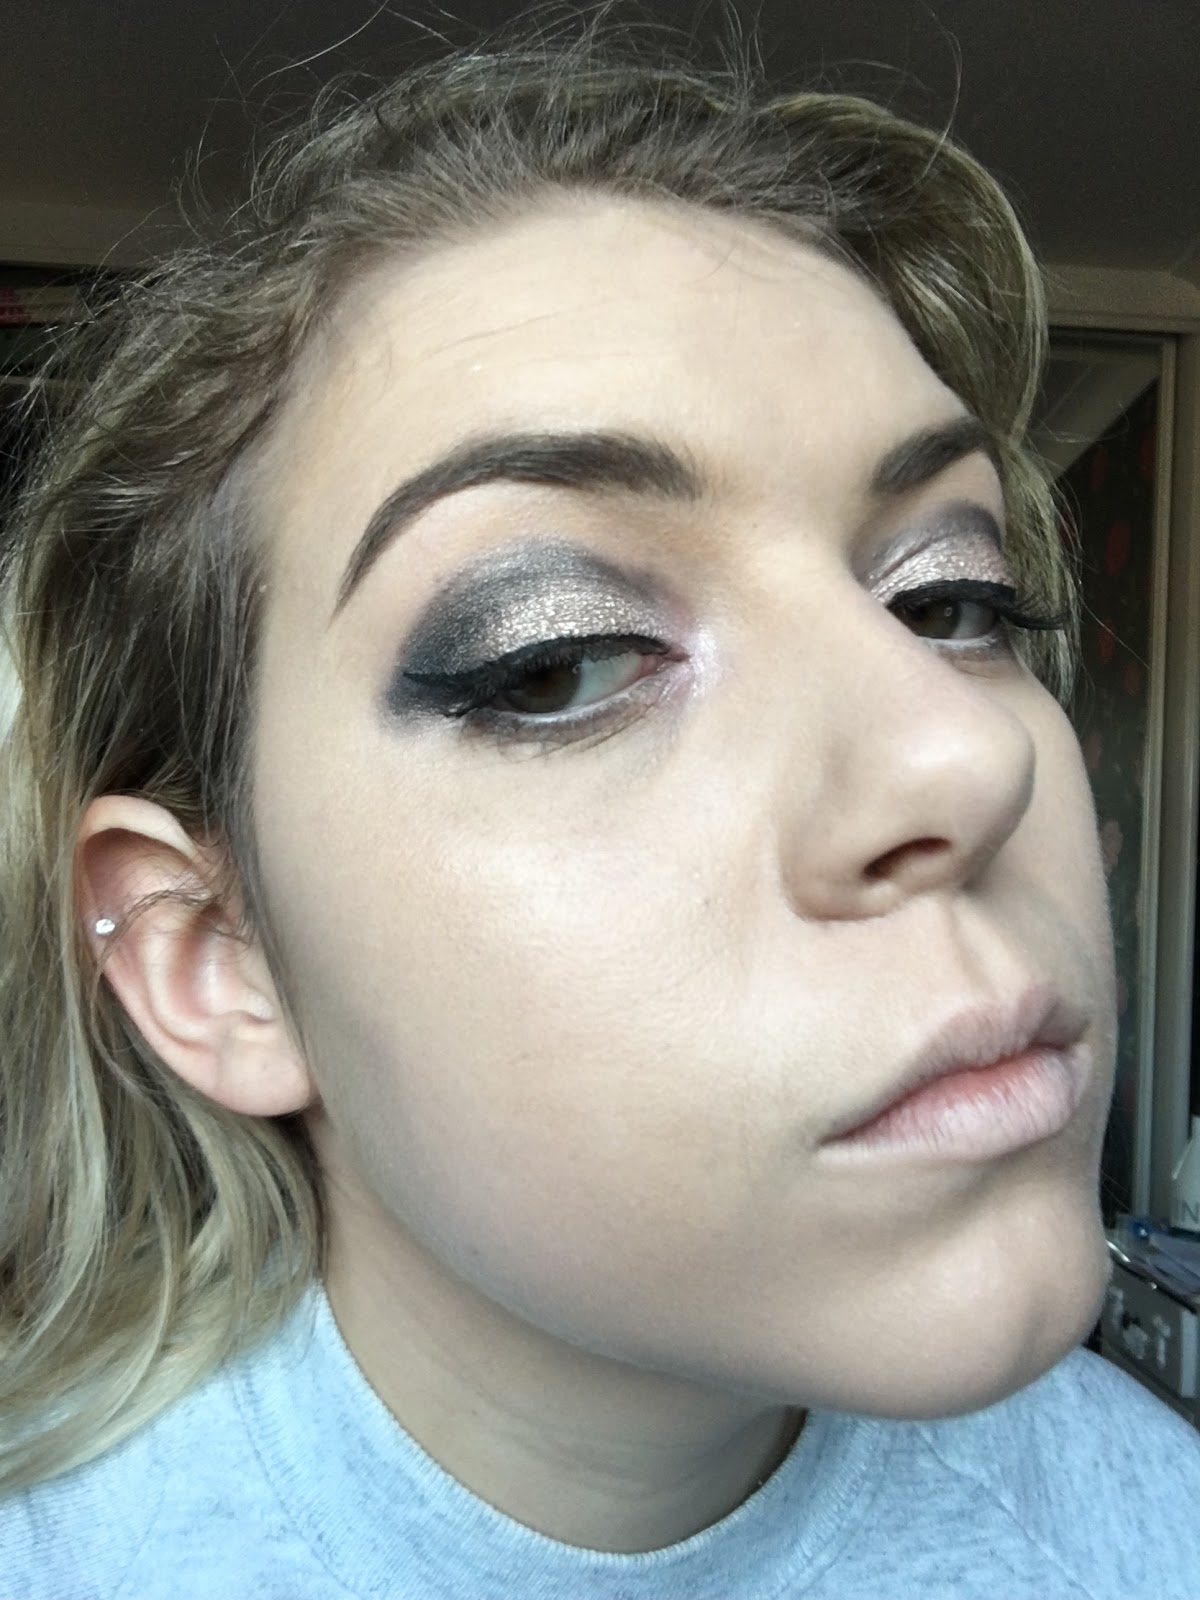
7 next, I add a bit of eye shadow primer or concealer to my eye lids - I’m currently using elf gold eye primer
8 add dark brown shade of eye shadow to the outer corners with a Primark flat eyeshadow/concealer brush
9 add a high light champagne shade to the inner corners of the eyes with a small seventeen eye shadow brush
10 add gold shadow to the centre of the eyes blending all shades together without a fluffyish No7 eye shadow brush
11 Black felt eyeliner
12 Black liquid eye liner in a wing
13 eyebrow pencil - love mine from Primark
14 Cream highlighter from the maybelline master camo compact
15 powder highlighter from bookie
16 curl eyelashes
17 apply mascara which I’m using a Barry M at the mo


In hindsight this may be a bit too long for my everyday work make up. *goes to reinvent herself*

Thursday, 7 December 2017

New Favourite Makeup Item

Now that Christmas party season is here, I have the perfect makeup treat in mind!

The Stila Glitter & Glow Liquid Eye Shadow is Devine and an easy way to Glitter eyeshadow without the mess of glue and major fallout.  I first fell in love with this on instgram here;

https://instagram.com/p/Ba2VQGpBnOd/

So I had to get the shade rose gold retro as used in the instagram video above.

It retails at £23 for 4.5ml but I found it at lookfantastic.com for £19.55 and it is worth every penny.  You can also get a set of 3 mini ones which are perfect for a gift or to try different shades.  Stila have launch a mermaid collection with duo chrome shimmer and a standard shimmer collection for those who don't want actual glitter.

Firstly I love the packaging as it is sturdy and stylish with a matte gold top and gold foiled lettering on the clear acrylic tube.  It also comes in a gold box which illustrates the shade on one end.

The applicator is easy to use but you want to use a flat eye shadow brush to distribute the glitter more evenly as it can clump up.


My only criticism is that the colour looks more gold than rose gold on me but I will experiment with other eye shadows underneath.  I also recommend using an eyeshadow primer underneath it to ensure longevity and there is hardly any fallout of glitter.

Overall I love it and may invest in a silver one.

Tuesday, 7 November 2017

Mad on This Month; October

This October has really flown by!  I have been so busy buying a house and dealing with all the paperwork that comes with it.  What I have been loving are a couple of items really.

Firstly I am in love with any Benefit mascaras but I have "They're Real" and "Bad Girl Lash" ones which I sometimes use together.  I find that bad girl lash thickens and they're real, lengthens and separates.

I am also using this everyday, the maybelline master camo concealer with colour correcting pigments.  I use the green first on any red spots, yellow under the eyes and other colours on top of my foundation.  The best part is the creme highlighter which is so sparkly!  I set every part with powder and use them on my lids as eye shadow primer.


Monday, 30 October 2017

Halloween Look; Creepy Doll


I went to a Halloween house party this Saturday just gone and wanted to share my easy costume and makeup for a creepy doll.  Scary films like Annabelle really are making dolls popular and even more creepy so I tried a girly creepy doll and not too scary.  The best thing was that I didn't have to buy a thing!

Firstly I did a simple make up look, with pale base, defined eyebrows, highlighter and a higher rounded eye crease.  This was mainly so I could pop to the shop without scarring anyone but this pic is a little strange, I know.

I then added thick white eyeliner (NYX jumbo liner in milk) to my lower lashline and down onto my  "eye bags" to make the whites of my eyes appear bigger and more rounded.  Then I lined that new eye outline with black (Any felt black liner and boots natural collection liquid liner for the finer parts)  most of the way and drew on small curved eye lashes as you can see below.

I used a brown eyeliner to add freckles randomly across my cheeks and nose.  Then drew cracks on my face with black eye liner.  It's easier to create a centre for the crack with a filled in triangle then draw in jagged lines outwards.  I added a smudge of the white eyeliner to some sides of the cracks to make it seem more 3D.  To enhance those doll like eyes, I elongated my signature black flick and added false eye lashes (I completely forgot how fiddly these are).

This was fun to create and easy to wear as I just picked a doll like dress, pigtails and done knee high socks.  I find "normal" clothes much more comfortable than shiny, itchy costumes.
And here I am with some Snapchat filters!


P.S. I completely forgot to contour my face with matte grey eye shadow but it doesn't make that much difference.

Monday, 11 September 2017

Short Trip Packing; The Only Way is Marbs

At the beginning of last month I went to Marbella with my Fiance and 5 others friends for a short break.  We booked this quite last minute and had hand luggage only.  However the 1 other girl that went had a checked in suitcase.  This all seems like ages ago now but I thought I would share how I prepared for a weekend in the sun with limited luggage space.

First, I purchased a small flexible cabin sized suitcase with 4 wheels which I think is important as its easier to pack and also quicker to move without getting in people's way in the airport.  I got it in the Summer sale at Matalan for £23 which isn't too bad but you can also get them from Primark for about the same price.  I can also use this case for just short trips in the UK instead of several heavy bags.
I took the following with me;

Shoes

  • Skechers Trainers
  • Flip Flops
  • Strappy Wedges
Clothes
  • 2 pairs of shorts
  • 1 nightdress
  • 5 pairs of knickers
  • 2 bras
  • 4 pairs of socks
  • 3 dresses
  • 1 skirt
  • 4 tops
  • 1 pair of jeans
  • 1 hoodie
  • 2 Bikinnis
  • 1 Swimsuit
Liquids (you`re allowed up to 10 items 100ml or under each, in 1 clear bag)
  • Shampoo
  • Bodywash
  • Deoderant
  • Hairspray
  • 2 Suntan Lotions
  • After sun aloe vera gel
Unfortunately I had to put my make up bag and perfume in my friend's checked in suitcase as I had too many liquids including creams in there.

Stuff

  • 1 Small Handbag
  • 1 Shopping Bag
  • Chargers
  • European Adapter Plug
  • Phone
  • Passport
  • Purse
  • 6 Hair Grips
  • 3 Hair Bands
  • Small Hairbrush
  • Toothbrush
  • Wash Puff
  • Make Up Wipes
  • Tissues
  • Painkillers
  • Breakfast Bars
  • Plasters
  • Purse
  • Sunglasses
  • 3 Necklaces
  • 1 Bracelet
  • 2 Earrings
  • 1 Watch
  • and probably some other bits I've forgotten

It all worked out great and I had a blast.


p.s Spanish supermarkets have great temporary tattoos and bracelets


Monday, 4 September 2017

Mini Make Up Tip Monday; Felt Eyeliners

I read a tip somewhere that really intrugued me to try it.

Apperently you can turn the tip of a felt liner the other way around when it starts drying out and you get a new nib.  Naturally I couldn't quite believe this so I tried it on both my felt liners.  One is a cheap one from Superdrug's MUA collection and the other is from Eyeko London which is about £12.99 but I got it in a magazine.

Please be warned that this can be messy so you will need some kitchen roll or lint free Cotten pads to grip the tip.  The black can stain as it is still in my make up towel.


Monday, 31 July 2017

Mini Make Up Tip Monday; Powder

We all hate it when we hit the pan on our favourite powder make up but it is especially annoying when this happens on your setting powder as you use this every day.

The worst part of running out of powder is when it breaks off into useless small pieces of powder that get stuck in your brush and end up everywhere.

I have found a new trip that works especially well if you have just a lid to your powder but you could try it with a compact with a mirror.  I do the following to get the most product out;


  1. Shake the product upside down so the powder separates in the lid
  2. Turn to the product the right way up
  3. Carefully open the lid so the powder stick to the lid but any bits are in the pan side
  4. Place you brush in the loose powder that should now be sitting in the lid
  5. Apple to your face a normal


Wednesday, 5 July 2017

Cheap Beauty Organisers


I love having all my beauty and cosmetic products organised so I can see them all and utilise the space I have.

I do like the clear acrylic organisers like the Kardashians have, and you can find them in T K Max, muji and now primark have made some but there are cheaper alternatives.  I keep my fancy make up in my muji, two draw set and a few bits of jewellery as I purchased the velvet insert with ring cushions on one side.

People have made some pretty organisers out of cardboard and toilet roll insides that you can find all over YouTube and Pinterest.  I don't always like the DIY look but you can get pretty creative with patterned paper or a mirror finish.

My great idea is to use square, cotton ear bud holders/contains for storing nail varnishes neatly and circular ones to store lip glosses as they tend to be taller or at least more sturdy.


I have also used plastic tubs such as ice cream tubs or butter ones to separate hair accessories.  This isn't as glamorous as some options but is fine if just buried in a draw like mine.

The best containers are from ferrero rocher as they are acrylic and clear, often with lids!

This is also great recycling!

Wednesday, 10 May 2017

Online Shopping

Online shopping can be a minefield especially when it comes to 'cheap' clothes.  You might think you are getting a great deal for something a celebrity wore but really it's just a cheap imitation.  They also make those clothes look damn good in the photos.  Sizing is also a huge issue as you can't try clothes on before you buy them.

I tend to stick to high street shops that have online shops as I am familiar with the sizing and can take the back to the shop.

However my favourite thing about online shopping is cash back.  This is where you do your normal shop but go through a cash back website first in order for them to request a percentage of the purchase value from the retailer to be paid back to you.  I don't know how it works but it does and I have rant about £10 back over the past couple of years.

It can take a couple a weeks or a couple of months but it's better than nothing.

My favourite websites are;
TopCashBack
Quidco

Also you get free money if you successfully refer other people to sign up.

P.s I have yet to try online supermarket shopping for food but it sounds convenient so I will up date you if I do

Monday, 27 February 2017

Making Jewellery

Yes I know, me making jewellery, something that requires time, patience and an eye for detail which I don't often have time for.  As you know I love art and creating new things but it's more rewarding and easier for me if there is a purpose to the art.

This time I am creating pieces for my wedding which is couple of years away, but who's counting?  I have seen so many wonderful hair vines on Instagram and on stalls at wedding shows and I though I'd  have a go myself.  It can't be that hard, can it?

These "vintage" pieces seem to command a £100 price tag which seems pretty crazy to me as it takes about £10 or less to make.  It does however take a lot of time and skill to get to that standard.

So I popped to hobby craft, got so wire and beads then set to work.  Of course I watched a few videos  on YouTube to get gist of it.

I got silver plated wire that seemed decent at £2.90, some pearl 6mm beads for £1.20 and some crystal cushion cut 6mm beads for £1.20.  I had a few tiny other beads to at home as well.

Generally what you do is put the beads on the wire, fold and twist the wire together to secure this close together or further apart to create a pattern.  I think it looks better with a random pattern but I like to have control in a pattern.

First off the wire was too thick and hard to manipulate but the beads went really well with silver and I made this small piece;

I also tried my hand at earring hooks but I shaped them round a sharpe and seems a bit too thick;


I decided to buy some thinner more flexible wire from a local sewing shop but I think I went from one extreme to another as it was too thin.  This means I decided to combine the 2 together so using the thicker wire as a central twine and then twist the thinner wire around it to secure the beads.


At first it looked very straight and unnatural so I decided to brush all the "branches" one way to create the effect that they have "grown" from the centre stem which can be wrapped around hair.

Monday, 6 February 2017

Wedding Planning; The Initial Stages

I have decide to focus are starting wedding planning for the start of this year for the following reasons;

  1. Venues can get booked up fast
  2. It will cost a lot of money
  3. We can't buy a house yet due to scedualling at the moment
  4. There are lots of weddings shows and fayres on at the start and the end of the year when it isn't main wedding season
This means that I have now been to 4 wedding shows/fayres during January at 4 different venues in my area.  I will be going to many more so that I can see most of the venues close to me to consider for the big day.

I have made a checklist criteria to score the venues out of 10 on each aspect so that I can compare them in a similar way.  My important points to mark, are as follows;
  • First Impressions (so how great I first think it is)
  • Size of Venue (how many people can they accommodate)
  • Size of Car Park (or if there is anywhere else to park)
  • Rooms to Sleep (are their bedrooms and are they decent)
  • Gardens & Grounds (is the outside grounds nice, photographic and big enough for all guests)
  • Decoration/Character (does it need decorating, is anything included and does it have character)
  • Access for the Elderly (are there lifts, ramps or no steps to make things easier)
  • Exclusivity (will anyone else be there, general public and how many)
With all the marks out of 10, each venue racks up a total score out of 80 to give an overall picture of the suitability.  I also have a section for whether the venue is availblie on the date and also the price.  The price is difficult to get without going for a full quote from the event co coordinators at the venue.  Most serious wedding venues have a PDF or hard copy brochure that has guide prices on for most aspects of the day so that you make make up a rough price.  Most venues also have packages with a ceremony included for a certain number of guests and a price per extra guest.  Things can change often so I will get proper quotes once I have narrowed down the best contenders.

I am also looking at themes and what the stationary should look like to reflect the themes.  Pinterest is really helping with ideas and visualising what everything can look like so I recommend to go there first.  

I have also completed my guest list so that I know how many people for quotes and space. So I have 80 people in the day and about 100 for the evening.  My main tool for this has been www.bridebook.co.uk which I found through a Facebook advert.  It is great because it allows you to set a budget for each item, shortlist suppliers, venues and create your guest list including a wait list.  It also has a task list that shows small steps that you can do each month closer to your wedding.

My other guide for planning and finding wedding shows and information is www.guidesforbrides.co.uk Where you can look at local information and events.

Monday, 23 January 2017

Organisation

Organising my life is hard and it's about to get even tougher this year.  I am buying a house, moving out and planning a wedding.  Yes, my wedding but that isn't until 2019, phew!

My main obstacle is the sheer amount of possessions I have collected over my 24 years of life.  This includes clothes, accessories, shoes, bags, ticket stubs and toiletries.  I have filled every draw and cupboard; I even got a lift up storage bed.

It's time to make a start tidying and getting rid of a lot of stuff, in preparation for moving out later this year.

I realised this, just trying to sort out my toiletries.  I have at least 3 bubble bath bottle, 3 anti humidifying hair treatments, numerous body washes and loads of body lotions.  Then just look at the picture below to see my mini travel tolletries, inspect repellant and tolletry bags overflowing from the draw divider I am supposed to be keeping them in;

I am ok at being organised in work and with events as I always carry a diary as well as my iPhone.

Tuesday, 6 December 2016

I'm back!

Apologies for the long lack of posts but I have been on holiday in Mexico!

With a holiday or "vacation" as the Americans say, there are airports involved and that means duty free shopping!

So this time I got 2 new beauty items as follows;
I firstly bought this MAC matte lipstick in the shade, Please Me and it was 280 Mexican pesos.  Now this is my first ever MAC purchase so I had no idea what I was doing but all I knew is that I wanted a nude, pink, peach lipstick in matte finish.

After filling my hand with many swatches I finally settled on the above colour but when I tried it on at home, it was way brighter than I expected! The matte finish and time it lasts it great but will have to play with the colour application a bit.

The second product I bought was on the plane with Thomas Cook and I saw it I their summer duty free magazine as well. It is a mineral bronzing powder that also tans your face with the help of liquid foundation or moisturiser.
It's called Vita Liberata Luxury Tan and I love the colour of it and glow it gives you but I don't personally think it tans my actual skin underneath my make up.


Monday, 31 October 2016

7 Pounds in 1 Week

7 pounds, in 1 week?  Is this how much I've spent or how much I have saved?  No, this is how much weight I have lost!

I have adopted the lifestyle of Slimming World.  The Extra Easy plan is really easy to follow as there are only a few key rules.

I'm not 100% great on rules and regulations but basically you have 15 Syns a day (20 for a man) then a healthy A and a healthy B.  The A is dairy so either milk or cheese and the B is wheat so 2 pieces of whole meal bread or 2 weatabix.

The "free" items are meat, pasta, rice, vegetables and fruit so you can eat as much of these as you want. Most over things will be a number of Syns defined by the slimming world lists or information found online.  The best thing to do is join a group, with support and guidance on how to plan you meals.  You will also have a weekly weigh in and get rewarded for mile stone weight loss such as 1/2 stone, 1 stone, 1 1/2 stone and so on.

There are lots of blogs, forums and books with plenty of support from like minded people and receipies to make you favourite meals, sun free.

How I started is by popping to Iceland, picking up some frozen slimming world meals and rice then also picked up some mug shots for lunch times.  This has started me off and inspired me to try my own receipies and think creatively about everything I eat.

If you want to shift some weight, I recommend this plan to everyone and you can even just do an online version with an app.

Wednesday, 19 October 2016

New Tips and Tricks

Whilst looking on my Facebook timeline I spotted a makeup artist I followed ages ago, so looked at her work and saw some great "cut creases".  I have tried and kinda failed at trying this look as I had no idea how to achieve it.  But this is because I just thought you put the eyeshadow on and just blend but it's a bit more technical.

This is before YouTube;

And this is after;


Turns out, this make up artist has a YouTube page with tutorial videos which include a cut crease here; https://m.youtube.com/channel/UCyHvYKdVpwjei4H80VHAAsg

What I learnt from her videos is the following;


  1. Blending is key on your face which I knew anyway but she uses serval different types of brushes to blend the face make up
  2. I need me some translucent loose powder for baking and protecting my under eye from eyeshadow fallout - apparently collection have a cheap one that I must seek out in Boots or Superdrug
  3. Liquid bronzer or darker liquid concealer is perfect for contouring your face
  4. The secrets to a cut crease is to start with the crease, slowly adding shadow blending and building up the darkness in the crease.  Then you cover just the eyelid in either eye shadow primer or a long wear eye cream/pencil such as the NYX Jumbo Eye Crayon (think I'm gunna get this in the colour "milk").  This can be moved around and right up to crease with a flat eye shadow or concealer brush. Then you can finish by putting a lighter or different colour eyeshadow on the on top of the lid only and then your usual eyeliner and mascara routine.

Wednesday, 21 September 2016

Plump Those Lips

I'm Recently I've seen loads of girls with insanely large lips pumped up with injected lip fillers, especially on Instagram and I think it looks gross!  On the other hand I see normal girls everyday who have thin lips and may not be able to afford these expensive treatments or simply disagree with the procedure.  I am not against cosmetic surgery or alterations as long as it makes you happy, confident and you don't go over the top.  There is also nothing wrong with thin lips but sometimes you want to make them look bigger so I have put all my tips together in a lip tutorial.
To achieve this look, I did the following;
1) Use lip scrub in a circular motion, then wash or wipe off (optional to use a lip plumper cream or suction tool at this point)
2) Use lip balm to calm the lips
3) Line lips with a neutral dark lip liner, just over the edge of your natural lip line, in a cross on the cuspids bow and 3 lines  in the middle of the bottom lip to create definition
4) Then fill the lips in with a slightly lighter nude lipstick, I had to mix 2 shades together
5) The next step is to add lipgloss to just the centre of the lips to make them appear plumped (I used a lip plumping gloss from Soap & Glory)
6) Carefully add a creamy concealer around the edge of the lips with a flat concealer brush to neaten the lines
7) Add highlighter (cream, liquid or powder) to the Cupid's bow on the skin above the lips to make this area stand out
I used the following products along with some others;